How To Import Contacts To Mailchimp
Find out how to import contacts to MailChimp with this MailChimp video tutorial
A simple process - but not if you don’t know how. Find out how with this MailChimp video tutorial.
A Quick Note Before We Begin:
Importing contacts to your MailChimp list without their specific permission is not only poor business practice, professionally unethical and in violation of MailChimp’s Acceptable Use Policy, it also violates international privacy laws. So if these things are important to you then don’t it. Adding people to your list just to get numbers is marketing at it’s worst and completely counterproductive. If you’re even remotely interested in building an audience that supports your business then you’ll care about ethical marketing. If you don’t know how to do it, hire me to show you how to do it right.
How You Build Your MailChimp List Ethically
In short, all you need to do is subscribe to seolar or stay tuned for updates on YouTube and you’ll find out pretty much everything you need to know.
The thing is, there are no shortcuts for the novice. You have to be prepared to put in the work required to build your audience online. You can either do it by organic means or you can pay for advertising. Whichever you choose the offer needs to be right.
You must know take the time to understand the needs of your audience. Failing that you will waste countless days, months and even years going down the wrong road (like I did).
Start small, be humble and open minded. Don’t rush it. Crawl, then walk, then run, and when you begin to click with people, when what you’re doing seems to resonate, pick up the tempo.
Here’s some light reading for you on the subject;
The Bad News
The bad news is that this process could take quite a while- 2 years is not an unusual amount of time to build your email list to a reasonable level whereby it supports you in your business.
The interim is where you test and build out your offer. It’s in this place where we are relatively unknown that we do the hard work. It may not be 2 years for you, it might be six months. If it is shorter than 2 years then that’s a bonus.
When I first started in business for myself back in 2000, it was three months before I landed my first big project. A 36K, 4 week job landed on my lap. That was a lot of money for a 25 year old who was previously making that in a year.
It was amazing, and I believe it came my way because I just got into what I was doing and didn’t rush the process.
The Good News
Play the long game, pursue quality, slow cooking so to speak, and your open rates on your email list will be high. 16% open rate on any list is pitiful and that or lower is what you can expect from adding people without their permission.
What you’re looking for is 30% or 40%, and you can achieve that if you play the long game.You might even be looking at 60% or 70% open rate on campaigns if you really focus on quality. Also, you don’t need a big list - that’s vanity metric. A small list with high open rates is perfectly acceptable.
In time your list members will grow, admire and support your work. So for now, subscribe for weekly updates and follow what I’ll show you here. I’m on the slow and steady buzz and I won’t send you astray.
Subscribe For Email Marketing Tips
Join Seolar for weekly email marketing tips and tutorialsseolar.com
So now, down to business…
How To Import Contacts To Mailchimp
A couple of things before we start…
Your contacts list will need to be in CSV file format. Find out more about CSV files here. I’m using Google Sheets to modify the CSV file for this demo. Where ever you happen to grab your contacts list from make sure it is in .csv format. You can use Excel or Open Office to edit your CSV file.
The list I will be importing is a MailChimp list I downloaded earlier from MailChimp. Yours may be from an email list held with Infusionsoft or Aweber if you’ve decided to move house. As noted above, I discourage you to add contacts from Gmail or LinkedIn who have not previously voluntarily joined your list.
The MailChimp account I am using is a free account I use for demo purposes.
Step 0
Firstly, log into your MailChimp account and click on lists
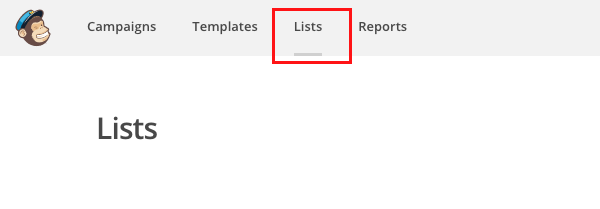
Fig. 0 Click on Lists
Step 1
If you are a first time user you’ll see the following message in fig. 1.
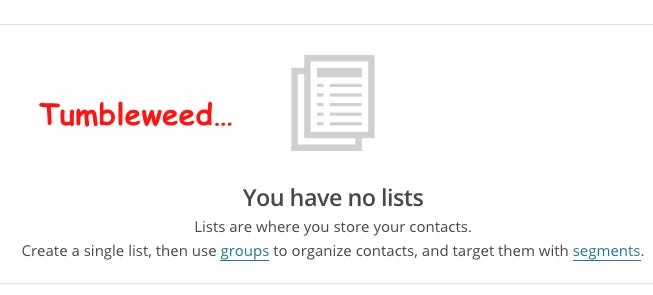
Fig. 1 Tumbleweed
Step 2
Time to create a list
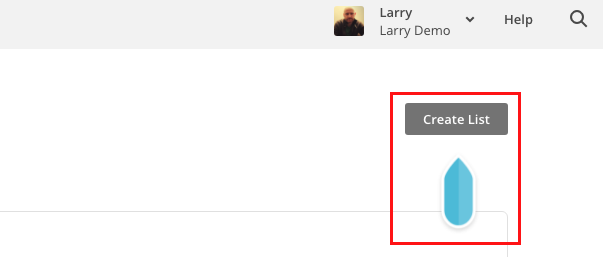
Fig. 2 Create a list
Step 3
The following window will open inviting you to create a list. Add the details as shown in fig. 3.
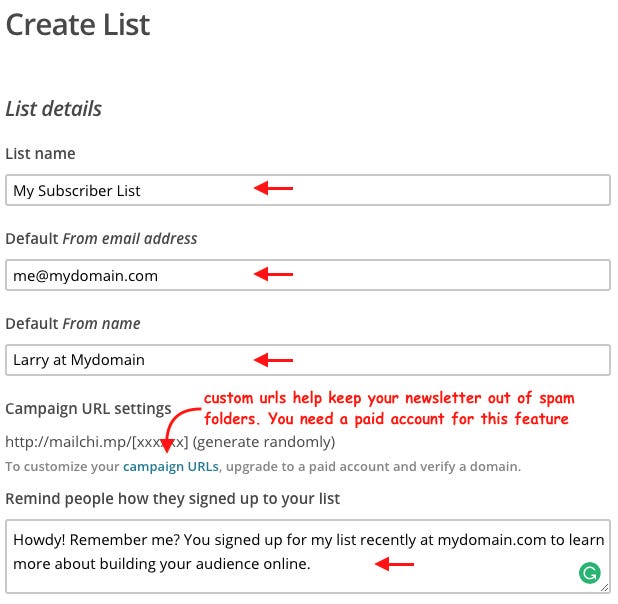
Fig. 3 Enter list details
Step 4
On the same page, edit your contact information where necessary, confirm that your confirmation email is correct and check the relevant box to receive notifications when subscribers join your list.
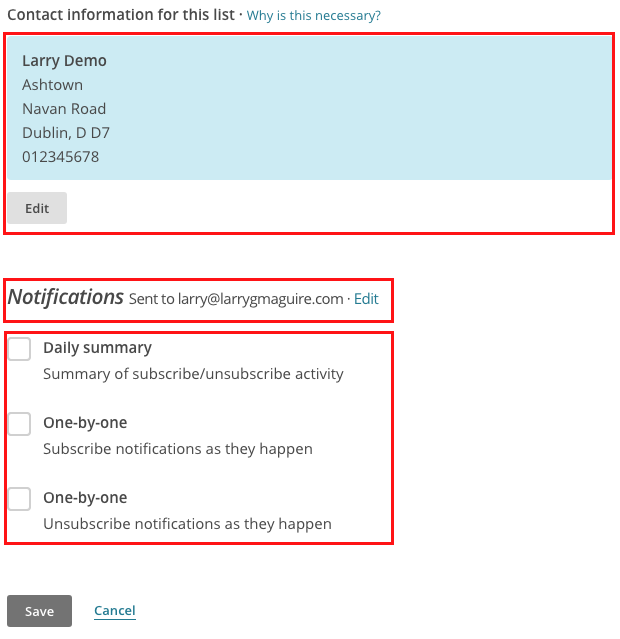
Fig. 4 Enter list details
Step 5
When you’re happy click Save and you’ll be brought to the following screen inside your newly created list. Click on Import subscribers to add your contacts.
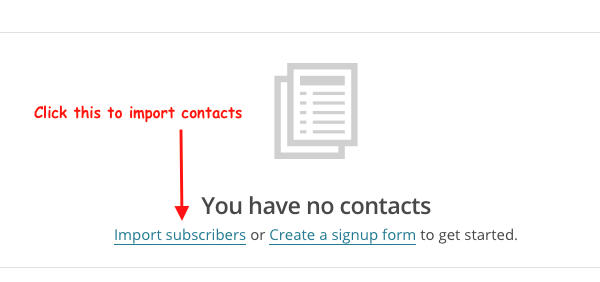
Fig. 5 Import subscribers
Step 6
Next, click on Add contacts, then Import contacts.
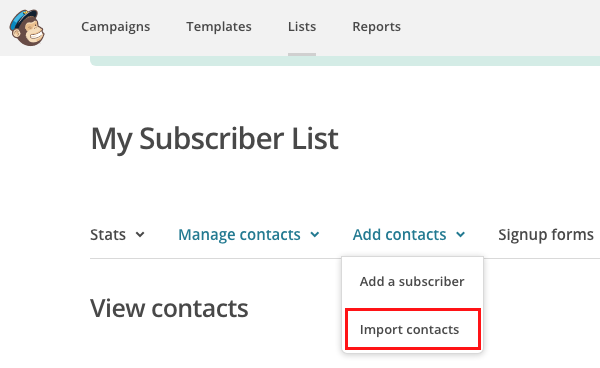
Fig. 6 Import contacts
Step 7
On the next screen you’ll be asked where you would like to import from. Choose CSV file. Hit next.
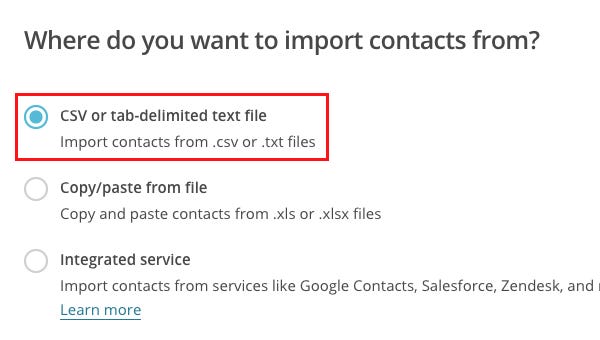
Fig. 7 CSV file
Step 8
Although this next bit is not essential, for beginners I recommend you follow it. We’re going to leave the MailChimp window open and go to the Excel or Google CSV file that you intend to import.
To make things simpler for the next part we’re going to remove all unnecessary columns from the CSV file. Without doing this our job synching details will be overcomplicated.
So, open the CSV file (I’m using Google Sheets).
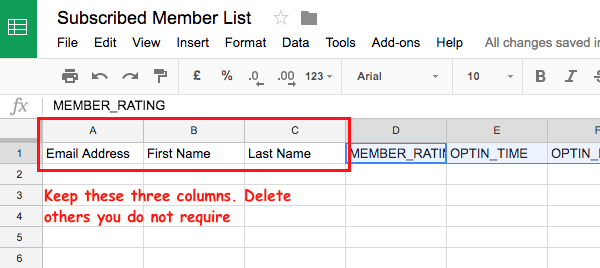
Fig. 8 Open the CSV file
Keep columns A, B & C (email address, First Name, Last Name). Delete all other columns with data you don’t need inside MailChimp.
Step 9
When you are happy with the changes click file, Download as, .csv current sheet to download to your computer.
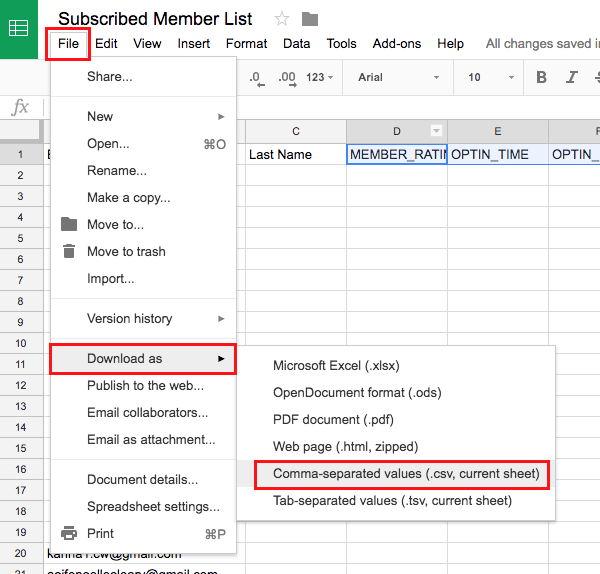
Fig. 9 Download the CSV file
Step 10
Now, go back to Mailchimp. The following window will be open from step #7 above. Now you’re ready to upload the CSV file.
Click browse and locate the file on your computer. Probably in your downloads folder.
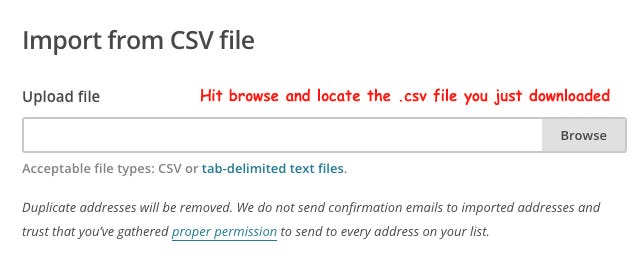
Fig. 10 Browse and import
Step 11
When you’ve located your CSV file, clcik Next
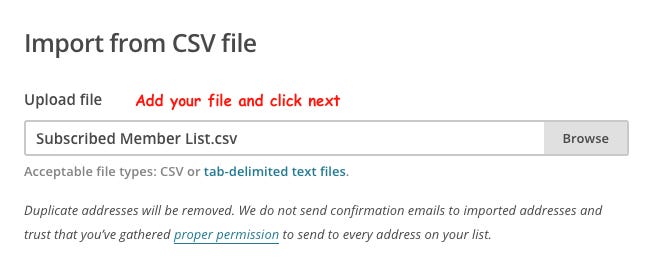
Fig. 11 CSV added
Step 12
In the next screen you see that MailChimp has seen and recognises the three columns from your CSV file; Email Address, First Name, Last Name. This is what you want.
Had you left all other columns instead of deleting you would have had to match these to new columns in MailChimp, or choose not to import the data. Either way it can be a bit confusing for beginners so that’s why I told you to delete them in step #8.
When MailChimp says “all columns are matched” you’re good to go. Click Next to proceed.
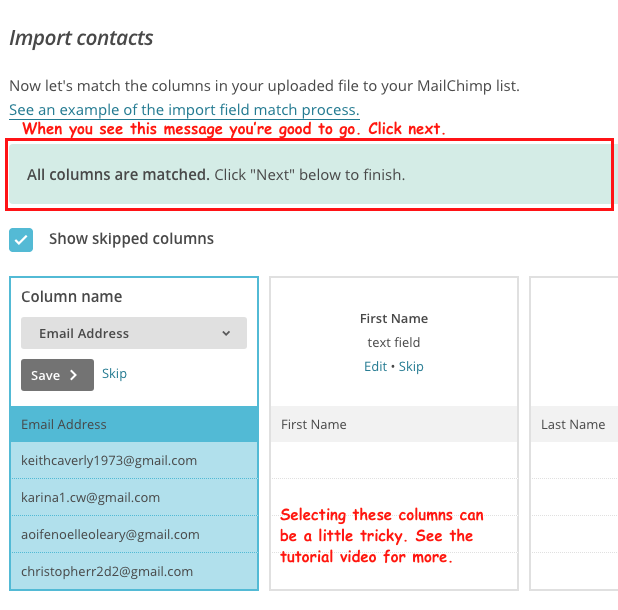
Fig. 12 All columns matched
Step 13
Next, you’ll need to choose how to categorise your contacts. Choose “Subscribed”
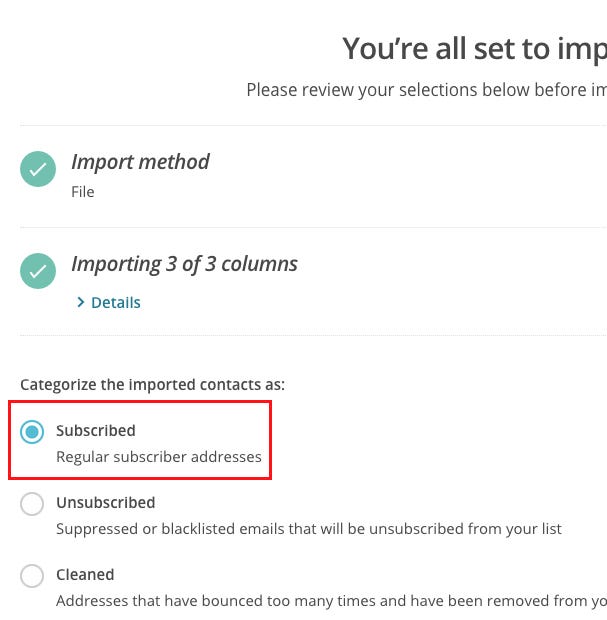
Fig. 13 Choose subscribed
Step 14
Hit Import

Fig. 14 Import
Step 15
Happy days! Your list of contacts are now successfully imported to your MailChimp list.
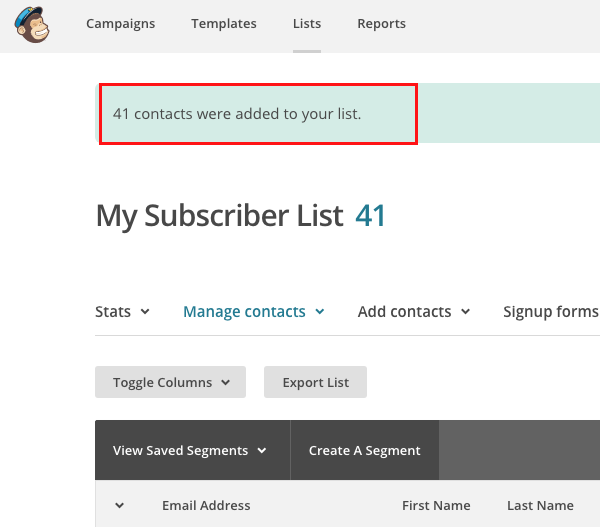
Fig. 15 Success!
Congratulations!
Congratulations you’ve successfully added your contacts to your email list. I know I said it a few times in this post but I want to stress again…
Please don’t sacrifice your personal and professional reputation by adding people to your list who have not specifically requested it. It’s a really poor show to do this.
Take the time to entice people to join your list by offering them value. This is the foundation your business will be built on.
Don’t be a spam head. Stay in touch with new articles and tutorial videos here on Seolar to discover ethical and reliable ways to grow your email list.

About The Author
Hi I’m Larry, creator of seolar.com. I publish weekly FREE marketing tutorials that help you build your audience and grow your business online. Get on board here for weekly updates
The Larb, Weekly Podcast For Creatives
Listen to The Larb, my weekly podcast for creative entrepreneurs and solo business owner out every week. Launches 7th September on iTunes, Stitcher and SoundCloud.

