How To Avoid Spam Filters When Sending Emails From Mailchimp [Video Tutorial]
The spam folder is the killer of many a great email. Here’s how to avoid it.
The spam folder is the killer of many a great email. Here’s how to avoid it.
In this MailChimp video tutorial you’ll learn How To Avoid Spam Filters When Sending Emails From Mailchimp.
How To Avoid Spam Filters: The Entire Process Step By Step

Log into your MailChimp account and click on your name in the top right hand corner of the screen.
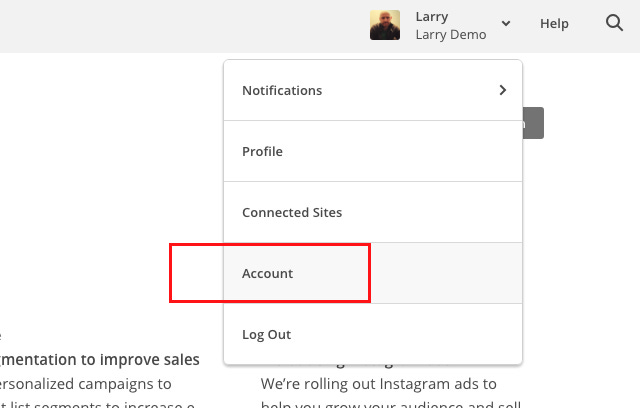
Then click the Account tab
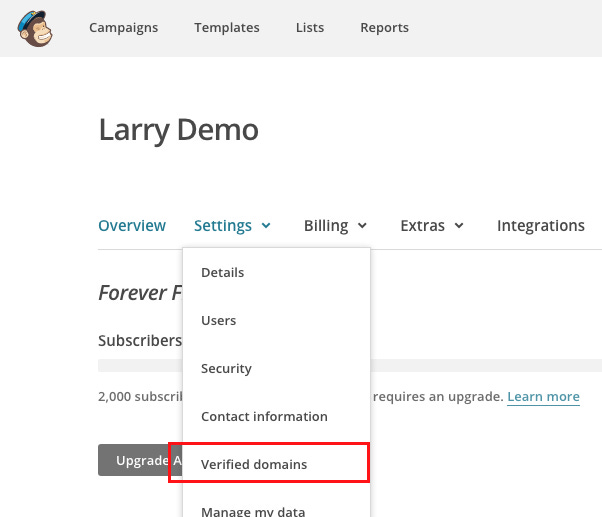
Click Settings, then Verified Domains
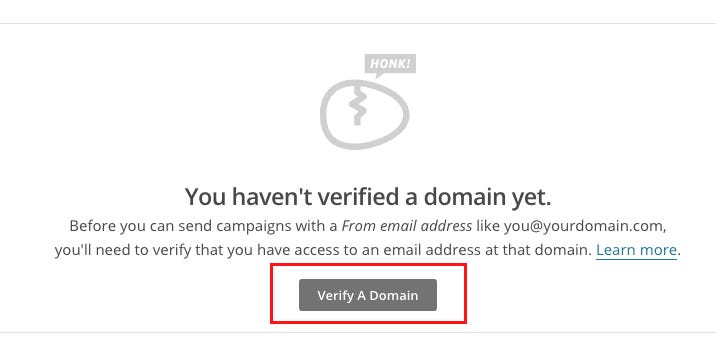
If you didn’t set up domain verification when you originally signed up you’ll need to do so here.
Click Verify A Domain button
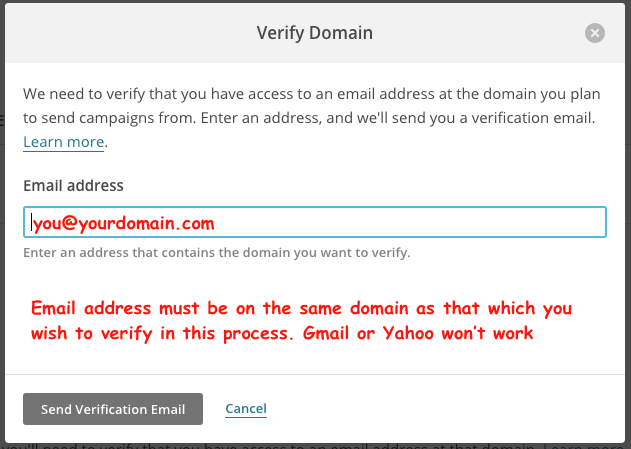
This pop up window will appear.
Enter your email address then click Send Verification Email.
This email address will need to be on the same domain as the domain you wish to verify. Gmail and Yahoo email addresses will not work due to free email account policies.
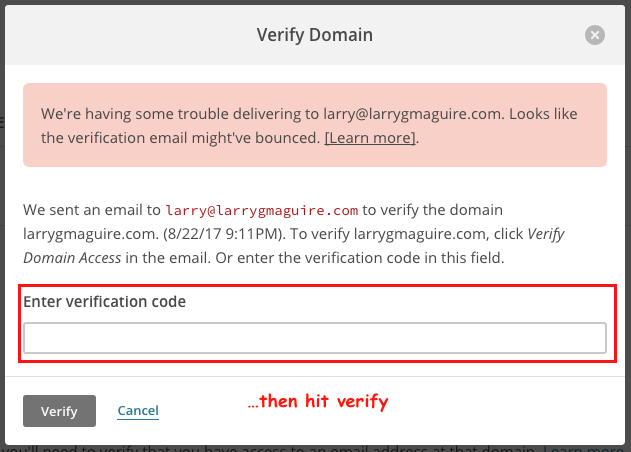
This popup window will appear. Now go to your email account and get the code that MailChimp just sent you.
Enter the alphanumeric code and hit Verify
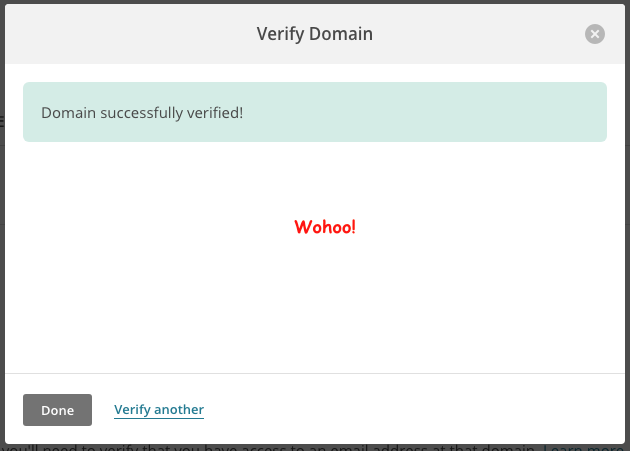
Your domain is now verified. But you’re only half way there.
Hit Done.
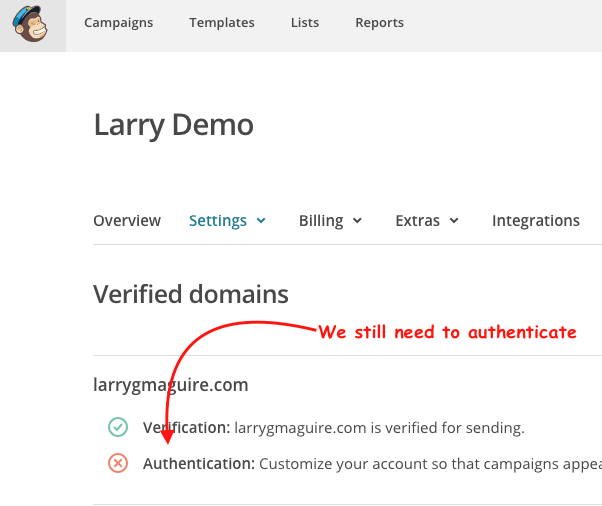
Now you’ve got to Authenticate your domain.
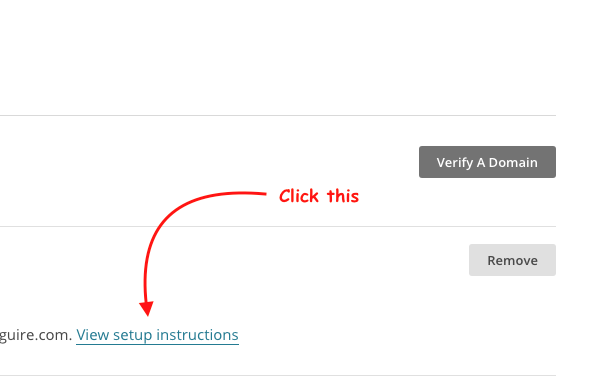
Click View setup instructions.
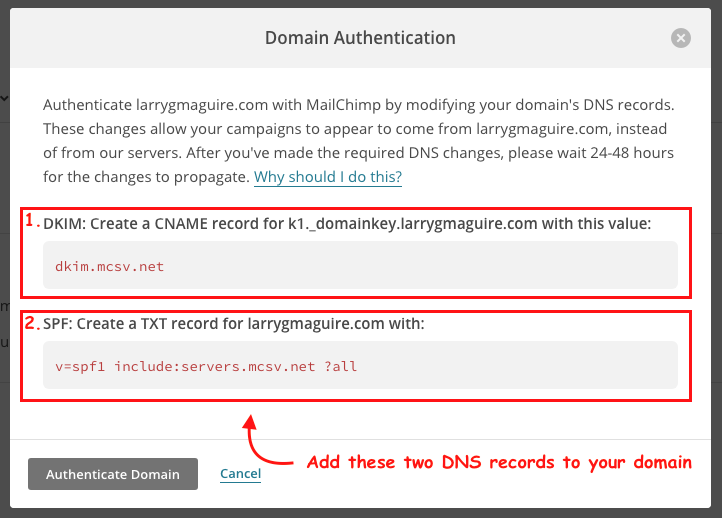
This pop up window will appear with instructions for you to add DNS records to your hosting account for the domain to be authenticated.
If you don’t know how to do this or you do not have access to your domain DNS settings then your host provider will need to do this for you.
You need to add a CNAME and a TXT record. Once they’ve been added you’ll need to wait anywhere from 15 mins to several hours for the changes to propagate on your domain.
You can close this window and come back to it later if you wish as closing it won’t affect things.
Click Authenticate Domain button and if all is well you should see the following screen.
Aside
This is where some cheap hosting packages let you down. They either take an age to do this for you or make a bags of the process. Check out Bluehost for better hosting
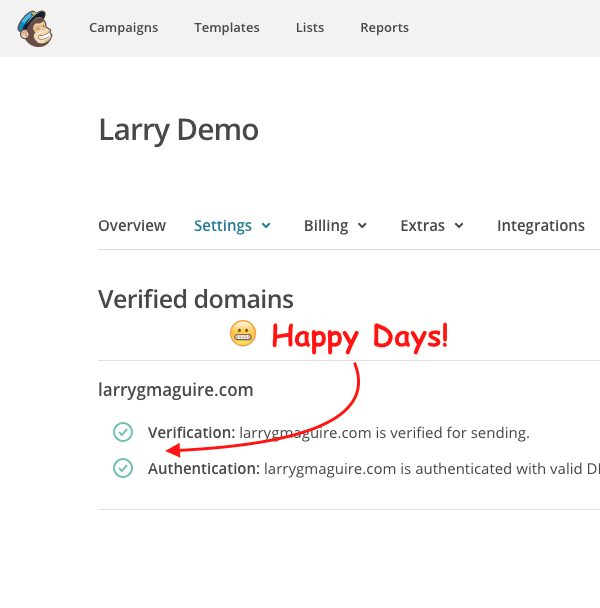
Once these DNS changes are completed you’ll see the following in your Verified Domains area within MailChimp.
Here’s Why You Need To Do This
When sending emails from a third party provider like MailChimp, certain information must be set up so that the email clients of your subscribers see your emails as safe.
When you verify your email domain in MailChimp, it checks that you are using a valid “From email address” hosted at your domain. This is to ensure you aren’t sending emails from bogus domains. It also helps keep your campaigns out of recipient’s spam folders and protect your reputation as a genuine source.
To verify your domain on MailChimp click the link in your MailChimp account as explained in the above video, enter your email address and MailChimp will send you a verification email.
When you get this verification email, copy the verification code and paste into the field in Mailchimp.
IMPORTANT NOTE
Free email account policies from the likes of Gmail, Yahoo and AOL, these free accounts can not be used to verify your domain. You need to own the domain and have access to the DNS of that domain to affect domain verification on MailChimp.
That’s it for this Monday’s issue of Monday Marketing. If you’d like to get notified of each issue you can get on board here and I’ll email you every Monday.
All the best for now, have a great week!
Larry

About The Author
Hi I’m Larry, creator of seolar.com. I publish weekly FREE marketing tutorials that help you build your audience and grow your business online. Get on board here for weekly updates
The Larb, Weekly Podcast For Creatives
Listen to The Larb, my weekly podcast for creative entrepreneurs and solo business owner out every week. Launches 7th September on iTunes, Stitcher and SoundCloud.

